Showing posts with label snacks. Show all posts

Tuesday, July 14, 2015

Biscoff (Cookie Butter) granola

I was kinda iffy on yogurt growing up until I realized that it became infinitely better when you added granola to it.  Store-bought granola can either be really delicious or really gross and lately the really delicious brand has been pretty expensive.  I decided to make my own, and I might not ever go back. 

The best part?  Being able to add whatever I want.  I've been getting ingredients from the bulk food section so it doesn't cost a fortune.

I forgot why I looked for a cookie butter granola recipe but I don't regret it.  This version is super easy and totally addictive.  

Thanks, Rachel Gurk!  I love this granola.  I should make some tonight.


INGREDIENTS:
  • 1/2 cup Biscoff spread (creamy, not crunchy)
  • 1 tablespoon oil (I used coconut)
  • 2 tablespoons honey
  • 1 teaspoon ground cinnamon
  • 3 cups thick cut rolled oats (I used quick oats instead)
  • 1 cup sliced raw almonds
  • 3 tablespoons ground flax 
  • pinch of salt

DIRECTIONS:

  1. Preheat oven to 300 degrees Fahrenheit. Line a rimmed baking sheet with parchment paper or Silpat baking mat.
  2. Add Biscoff spread and oil to a small bowl and heat in the microwave for 30 seconds on 50% power or until melty. Stir in honey.
  3. Meanwhile, in a large bowl, combine cinnamon, oats, almonds, ground flax (or wheat germ), and salt. Pour Biscoff mixture over the oat mixture and stir until well combined and all dry ingredients are coated. Spread onto prepared baking sheet in an even layer. Bake for 15 minutes, stir, and continue baking for 15-20 minutes or until golden brown. Let cool completely before storing in airtight container.

Tuesday, December 23, 2014

Blackberry Scones

I'm getting close to my due date which means that I need to try and cook/bake as much as possible before I get banned from my kitchen.

Blackberries were the inspiration for these scones, but they were just as good without the blackberries, too.  They were light and lemony.  I think you could easily use this as a base for other berries or even chocolate chips.

Thanks to Joanne and Adam Gallagher of Inspired Taste for creating this recipe!  The website has a great step-by-step tutorial as well.  Grating butter is definitely the way to go for maximum butter distribution.  I had to substitute yogurt for sour cream which made the batter a little too moist but I just dropped them like biscuits and baked them for 16 minutes.  This yielded 12 smaller scones for me.

Blackberry Scones

You Will Need
  • 2 cups all-purpose flour
  • 1/3 cup + 1 tablespoon sugar
  • 1 teaspoon baking powder
  • 1/4 teaspoon baking soda
  • 1/2 teaspoon salt
  • 1/2 cup unsalted butter, frozen
  • 1/2 cup sour cream, cold
  • 1 egg
  • 1 tablespoon grated lemon zest
  • 1 container (6 oz) fresh blackberries
Directions
  1. Heat oven to 400°F. Line cookie sheet with parchment paper or aluminum foil.
  2. In a large bowl, mix flour, 1/3 cup sugar, the baking powder, salt and baking soda.
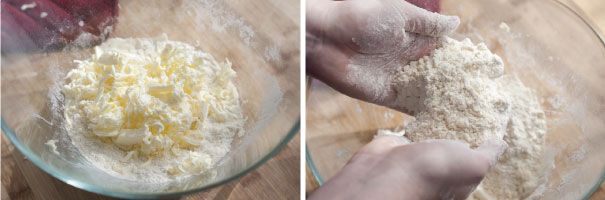
  3. Now, use a box grater to grate butter into flour mixture OR cut the butter into small cubes then work in with fingers until mixture looks like coarse meal.
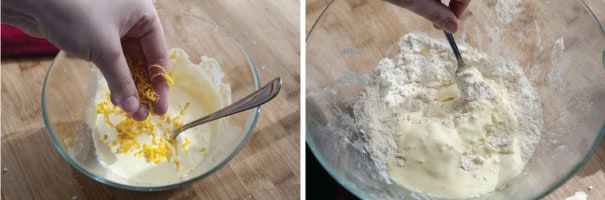
  4. In a small bowl, whisk sour cream, egg and lemon zest with a fork then add to flour and butter. Use the fork to stir everything together until just moistened. Add blackberries and gently stir into dough. Don't worry if some of the berries are smooshed or crushed a bit.
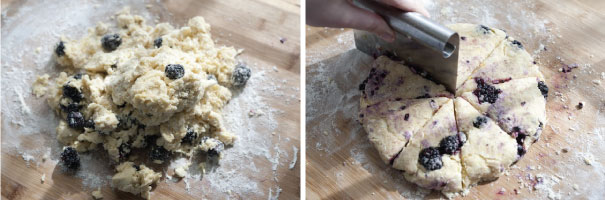
  5. Empty the loose dough out onto a clean, floured work surface then shape the dough into a 7-inch circle then cut the dough into 8 wedges and carefully transfer to the baking sheet. Sprinkle the top of each scone with the remaining sugar and bake 14 to 16 minutes or until light golden brown. Cool 5 to 10 minutes. Serve warm.
Notes and Tips
Use a box grater with large holes for grating the stick of butter, and make sure it’s very cold for best results.

Store cooled scones in an airtight container at room temperature 1 to 2 days or in the refrigerator 3 to 4 days. They can also be frozen up to 3 weeks.

Saturday, November 12, 2011

Spinach Artichoke Dip

I was trying to think of a good snack to eat during a football game and the Eng brothers' Spinach Artichoke Dip came to mind.  This isn't a healthy dish (you'll see when you read it) but at least it has spinach and artichokes!  Warning though: if you happen to reheat it, it's gonna be oily.  I would just make sure that you have enough people to eat it all on the first pass.  Between 4 of us (including two preggos) we got through 3/4 of it.  

I made it in an 8x8 glass pan so we had to increase the baking time by 5-10 minutes for it to heat properly.  Thanks to Scott for writing down the recipe and making notes on variations.  

Spinach Artichoke Dip

Ingredients
1 14 oz can artichoke hearts
1 8 oz package frozen chopped cooked spinach, defrosted
1 8 oz jar real mayonaise (no Miracle Whip!)
1/2 cup grated parmesan cheese
1 2-cup package shredded jack cheese

Directions
1. Preheat oven to 350 degrees.
2. Drain artichokes. Cut off all remaining leaves, to get ONLY the heart meat of the artichokes. Finely chop artichoke hearts. Drain spinach.
3. Mix artichoke hearts, spinach, mayonaise, parmesan, and 1 1/2 cup jack cheese in bowl. Spread mixture in tin pie pan. Cover top with remaining jack cheese.
4. Cover with foil and bake 15-18 minutes. Remove foil and bake an additional 3-5 minutes. Serve hot with unsalted corn tortilla chips.

Notes
If you don't want it that cheesy, take out 1/2 cup of jack cheese. Unsalted corn tortilla chips are absolutely the best chips to serve this with. Regular tortilla chips are a far second. Sourdough bread slices are good too. Plain crackers can be used if no suitable substitute can be found. I have tried this with fresh spinach that I steamed. It worked fine, but was more work. I have not tried this with fresh artichokes or low-fat anything. And always try to use real ingredients. That means no processed cheese, or mayonaise substitutes.

Thursday, May 26, 2011

Apple muffins

One of W's favorite desserts is apple cake, and these muffins actually taste like miniature versions of his beloved cake.  The outside of the muffin gets crunchy somehow, and it's a nice contrast to the warm, soft apple inside.


Side story:  I had class or something so I wasn't able to make it to a church event.  W had a piece of the famed apple cake and liked it so much that he brought back a piece for me just so I could try it.  I like it when we share food!


Thanks to The Girl Who Ate Everything!


Apple Muffins
Source: Marissa Pinon
Cream together:
2 cups sugar
2 eggs
1 cup oil
1 Tablespoon vanilla

Sift: (She didn't sift and either did I and they turned out great )
3 cups flour
1 teaspoon salt
1 teaspoon baking soda
1 teaspoon cinnamon

3 cups peeled, cored, diced apples (around 3 apples)
Brown sugar for topping (around 1/2 cup)

Directions:
Preheat oven to 350 degrees.

Add dry ingredients to creamed mixture. The batter will be very thick. Add the diced apples.

Butter & flour muffin tins or use paper liners. Fill muffin tins almost to the top about 3/4 of the way full. Sprinkle with brown sugar.

Bake at 350 degrees for 20-25 minutes. Makes 18-24 muffins.

Sunday, April 10, 2011

Banana Bread

My dad hated buying bananas because more often than not we'd let them sit around until they were too mushy to eat and then we'd throw them out.  I think he still hates buying bananas to this day. 

Luckily I now know that mushy bananas can be transformed into banana bread!  You have to make sure the bananas are ripe.  We're talking LOTS of brown spots cuz that means the starches have turned to sugars. 

Random story- we went to Hawaii in high school for a school trip and we went to this "secret island" somewhere.  After playing in the sun and surf I remember eating multiple pieces of banana bread at a little snack stand nearby.  Mmmm...

Usually I'd add chocolate chips but I decided to try the recipe as written.  I appreciated the simplicity.  Thanks to Elise from Simply Recipes for posting it!

Banana Bread
  • Prep time: 5 minutes
  • Cook time: 1 hour

Ingredients

  • 3 or 4 ripe bananas, smashed
  • 1/3 cup melted butter
  • 1 cup sugar (can easily reduce to 3/4 cup)
  • 1 egg, beaten
  • 1 teaspoon vanilla
  • 1 teaspoon baking soda
  • Pinch of salt
  • 1 1/2 cups of all-purpose flour

Method

No need for a mixer for this recipe. Preheat the oven to 350°F (175°C). With a wooden spoon, mix butter into the mashed bananas in a large mixing bowl. Mix in the sugar, egg, and vanilla. Sprinkle the baking soda and salt over the mixture and mix in. Add the flour last, mix. Pour mixture into a buttered 4x8 inch loaf pan. Bake for 1 hour. Cool on a rack. Remove from pan and slice to serve.
Yield: Makes one loaf.

Monday, February 28, 2011

Bagel Chips

I love carbs, so naturally I love bagels.  I used to mourn when they got stale but now I rejoice because I can make bagel chips!  I brought a huge container of these to work and they were gone within 4 hours.


Bagel Chips

Ingredients:
Stale savory bagels (at least two days old, but make sure they're not moldy), not pre-cut
Olive oil
Garlic powder
Salt
Pepper

Directions:
1. Cut bagels vertically so you have small, round bagel chips, approximately half a centimeter in width.  Try and make sure they're all about the same size so they bake evenly.  You and your bread knife will be best friends after this.
2. Preheat oven to 350 degrees.  Line a cookie sheet with foil.
3. Put the bagel pieces in a gallon-size plastic Ziploc bag, then add olive oil (approx 1/2 to 1 tbsp per bagel, but you can adjust it based on your preference.)  Mix it around so all the chips have olive oil on them; they shouldn't be drenched.  Once they're coated, add garlic powder, salt, and pepper.  Shake the bag to evenly distribute the spices.
4. Place the bagel chips on the baking sheet in a single layer.  Bake for approximately 9 minutes or until lightly browned.  Baking time will vary based on the size of your bagel chips. 
5. Let the chips cool and then enjoy!  They should be nice and crunchy.  If they're a little on the soft side put them in the oven for another minute or two- you can check this pretty soon after you've taken them out of the oven.

Modifications:
*You can mix the olive oil and spices together first and then mix them in the plastic bag.
*Alternatively, you can brush each bagel chip with the olive oil mixture on both sides, but I'm too lazy to do this.
*You can also mix them in a bowl, but just make sure you can visualize the chips so they have the right amount of olive oil on them.
*Feel free to add other spices for different tastes!